Creating a Zap: LeConnex as Action
1) Log into Zapier.com and click the "Make a Zap!" button on your Dashboard.
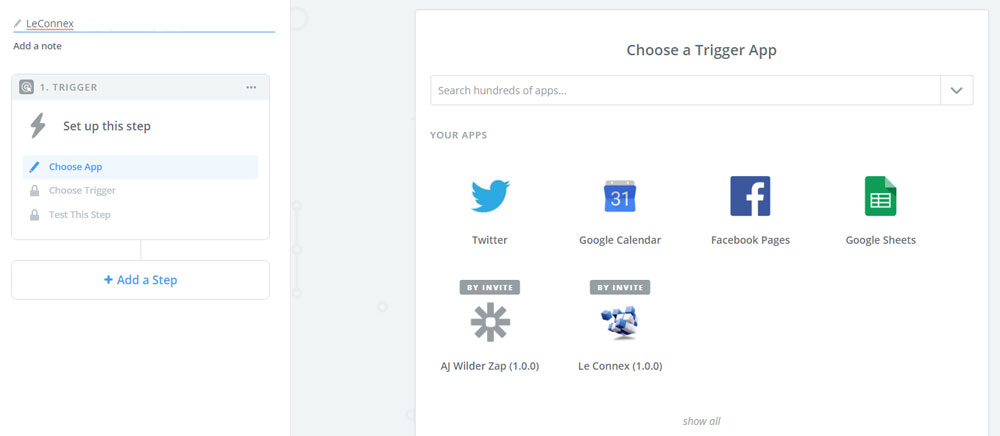
2) Fill in a name for your Zap (top left corner) and use the search box or list of "Your Apps" to select the app you wish to use as a trigger. If you do not see the app you want listed, you might need to click the "show all" link below the list. In this example, we will select "Google Sheets".
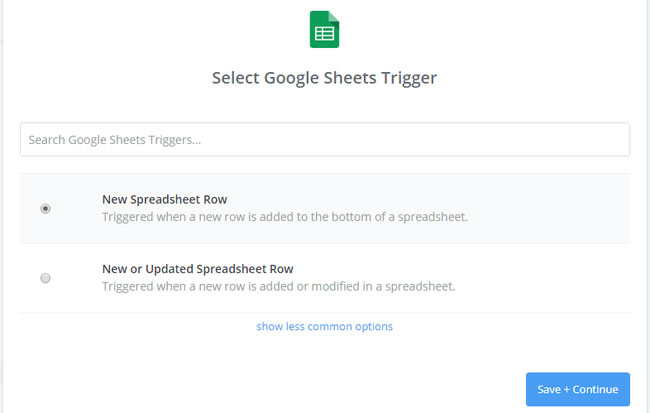
3) Select the trigger event for the app. In the example, we choose a new spreadsheet row as the trigger event. Click "Save + Continue" when done.
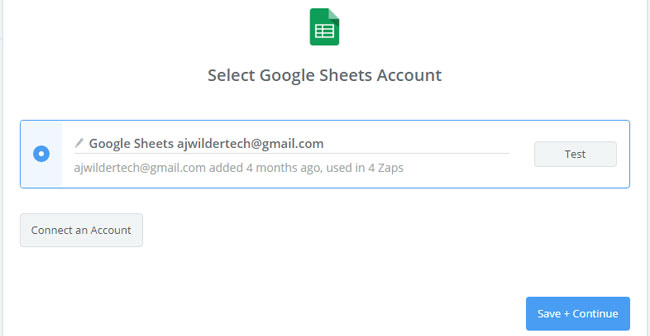
4) Select the account connection you wish to use. If you don't see it in the list, click "Connect an Account" and follow the instructions. (NOTE: you might need to refer to the third party app's instructions if you have never connected this app to Zapier before.) Click "Save + Continue" when done.
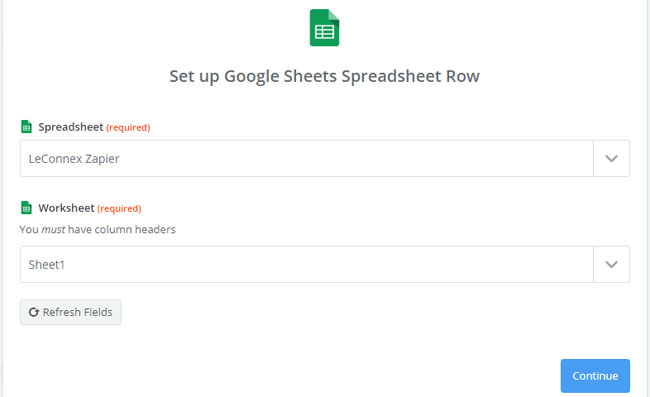
5) Depending on the app and/or trigger you select, you may need to set some options before proceeding. Here, we select a spreadsheet and worksheet from which Zapier will retrieve new rows. Click "Continue" when done.
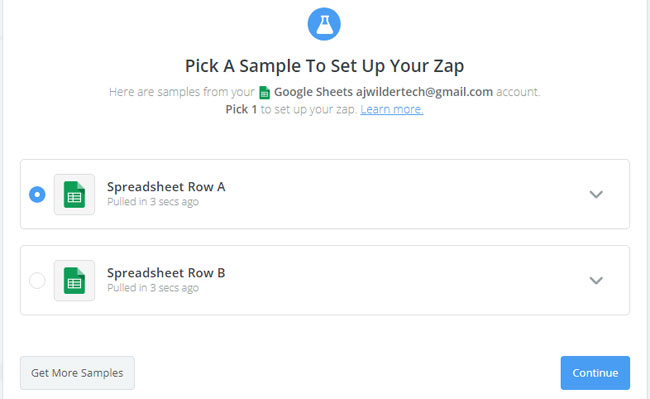
6) The Zapier system will now search for sample data to pull in. (It needs to do this in order for you to set up the field mapping in the action step.) Click the arrow button to expand a record, which shows a list of corresponding field names and values. Be sure to select a record that has values for all the data fields you wish to import to LeConnex. Please refer to the complete list of fields below. When done, click "Continue".
Data Fields Available to LeConnex
- Salutation
- First Name
- Last Name
- Date of Birth
- Age
- Gender
- Marital Status
- Dating Status
- Education
- Occupation
- Employer
- Special Needs/Comments
- Source/Where did you hear about us
- Phone 1 - Area Code
- Phone 1 - Number
- Phone 1 - Type
- Phone 2 - Area Code
- Phone 2 - Number
- Phone 2 - Type
- Street Address
- City
- State
- Postal Code
- Country
- + Up to 10 custom profile questions of your choosing (we'll cover how to map these questions next)
7) The trigger app setup is now complete. Next, we'll show you how to map custom fields. Feel free to skip over this step if your trigger app does not have any custom field data to import into LeConnex. In other words, if the lead/record information you're bringing in from your trigger app is limited to the fields listed above, then you won't need to perform this step.
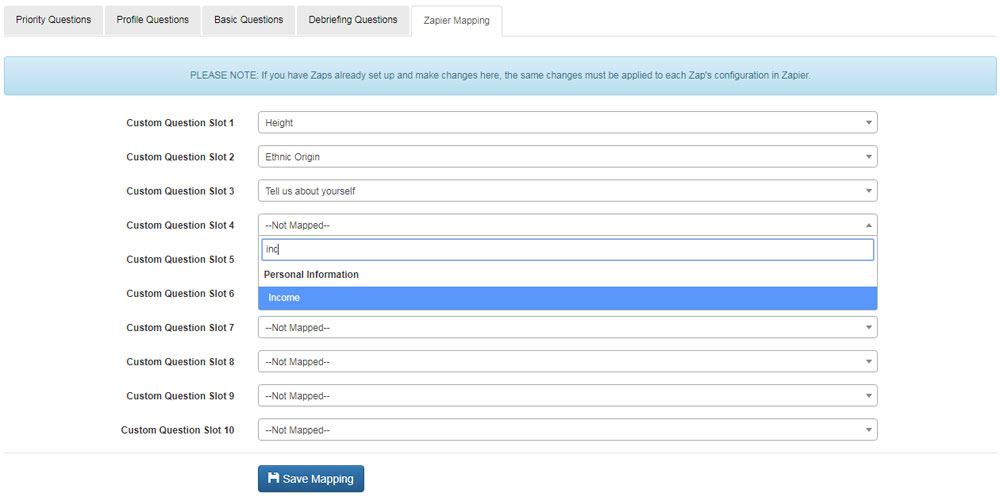
Log into your LeConnex system and go to the Question Manager tool. Click on the "Zapier Mapping" tab and you'll see a form with 10 dropdowns to set your mappings. Type in the textbox to search for a question by name, or scroll down to see all your profile questions in each dropdown. Click "Save Mapping" when finished. NOTE: If you need to make any changes or delete any of these mappings after your Zap is activated, you'll make them here first and then apply them to the action step of your Zap.
8) Return to your Zapier app and click "+ Add a Step" on the left flowchart to add your action. Choose "Le Connex" under Your Apps as the action app.
IMPORTANT: Please make sure you are using the latest version of the Le Connex app. The current version is 1.0.1. If you do not have access to the current version, please contact support and we will send you an invite.

9) Select the action. In this example, it will be "New Lead". Click "Save + Continue".
10) Select the Le Connex account connection you set up previously. Click "Save + Continue". (Note: If you skipped over the connection step before, then you'll need to click "Connect an Account" and follow our instructions to connect before proceeding with your Zap setup.)
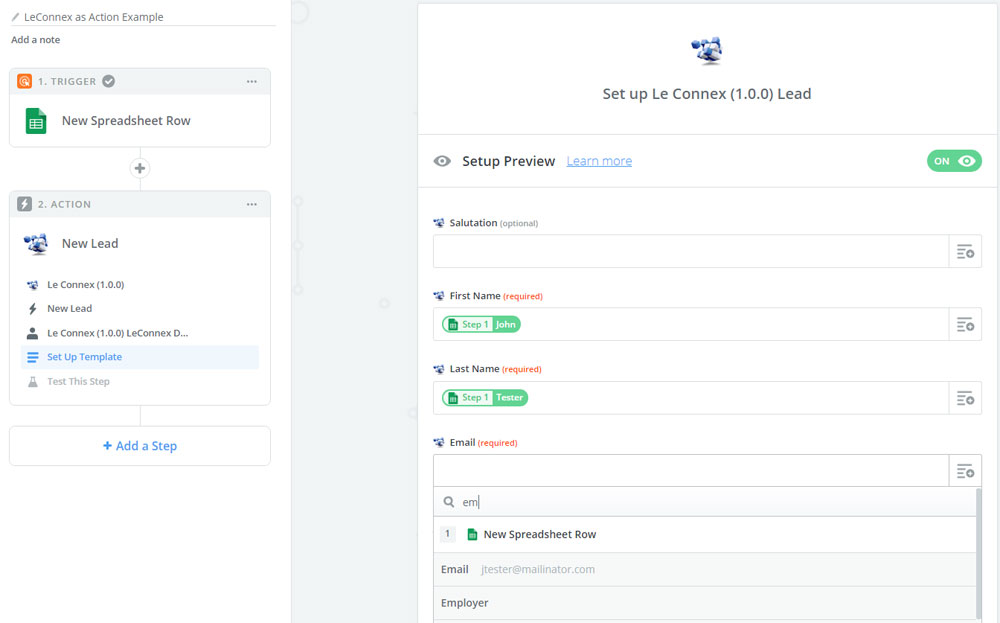
11) Next, you will set up a preview using the sample record retrieved in step 6. Essentially, what you are doing here is mapping the fields from a record in your trigger app with the corresponding fields in LeConnex. The value you pass in for a field can be a static/text value if it will be the same for every record that gets imported (useful if you have an 'imported from' custom field set to 'Zapier' or the trigger app's name, for instance). In most cases, however, you'll choose a matching field from the dropdown of data fields from your trigger app. Click the text box to add a text value; click the list-plus-arrow button to load the list of available fields.
Please note that First Name, Last Name, and Email are required fields, and email addresses must be unique. If your trigger app lacks First Name and/or Last Name, you must type in a static/text value for the missing fields. If it doesn't have Email, then the app is incompatible with LeConnex, unfortunately. The LeConnex system uses email addresses as a unique record identifier; this is why the field is always required, and attempts to add a record with a duplicate email through Zapier (or any LeConnex APIs, as a rule) will fail.
11) In the next screen, you will review the mappings you created in the previous step, in preparation to send a sample lead to LeConnex. Scroll through and make sure everything looks good; if you need to make any corrections, click the "Edit Template" step in the left flowchart. When done, click the "Send Test to Le Connex" button on the bottom right.

12) When you see a message that the test was successful, you have now completed the setup. We recommend checking the new lead in LeConnex just to make sure everything looks okay, but as long as no errors occurred during this step then all should be running smoothly. Click 'Finish', then click the switch to turn on your Zap, and you're all set!