Creating a Zap: LeConnex as Trigger
1) Log into Zapier.com and click the "Make a Zap!" button on your Dashboard.
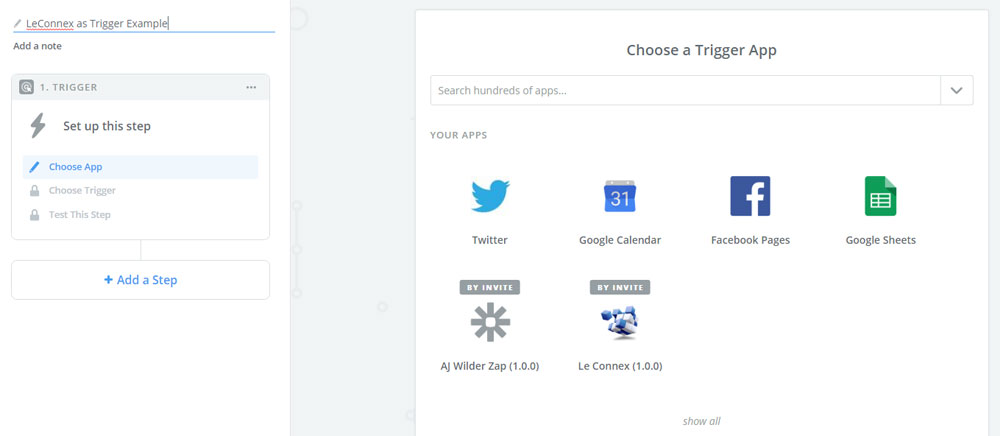
2) Fill in a name for your Zap (top left corner) and select the "Le Connex" app under "Your Apps". If you do not see "Le Connex" listed, you might need to click the "show all" link below the list.
IMPORTANT: Please make sure you are using the latest version of the Le Connex app. The current version is 1.0.1. If you do not have access to the current version, please contact support and we will send you an invite.
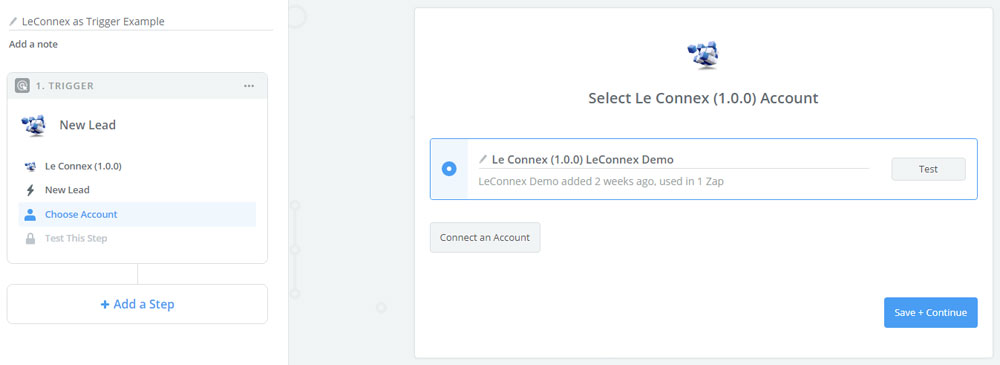
3) Select the trigger. In this example, it will be "New Lead". Click "Save + Continue".
4) Select the Le Connex account connection you set up previously. Click "Save + Continue". (Note: If you skipped over the connection step before, then you'll need to click "Connect an Account" and follow our instructions to connect before proceeding with your Zap setup.)
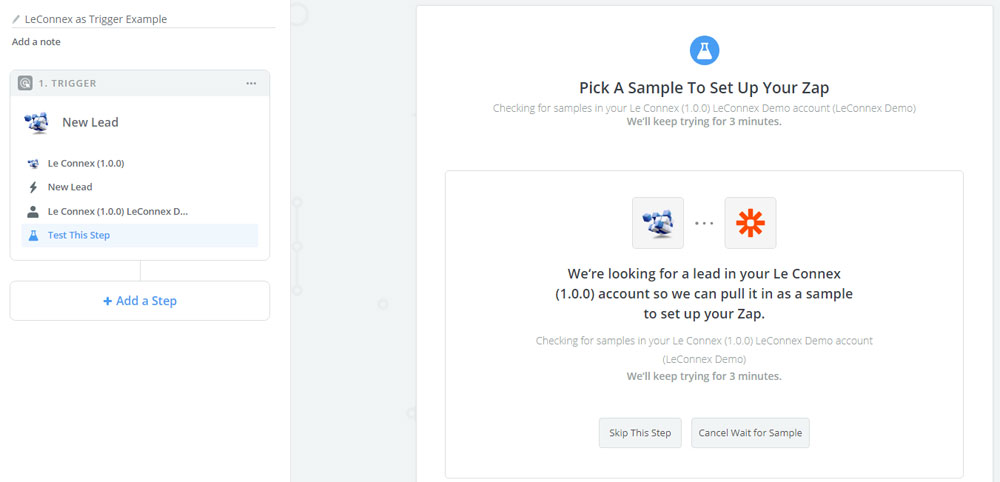
5) The Zapier system will now search for sample data to pull in. (It needs to do this in order for you to set up the field mapping in the action step.)
During this time, log into your LeConnex system and create a new lead using the "Enter New Lead" tool. In order to ensure a successful field mapping, we recommend filling out all data fields that are available to Zapier from LeConnex -- or, at least, those that you plan on doing something with in your action app. The full list of "actionable" fields are as follows:
- LeConnex Record ID (aka "Person ID")
- First Name
- Last Name
- Date Created
- Record Type
- Date of Birth (this will export as 'Age' - for privacy/security reasons we do not permit birth dates to be exported into third party apps)
- Gender
- Phone - Area Code (only the first or 'primary' phone number will be exported)
- Phone - Number
- Phone - Type
- Street Address
- City
- State
- Postal Code
- Country
TIP: We usually use a mailinator.com address when we test, which can be any alphanumeric text followed by "@mailinator.com".
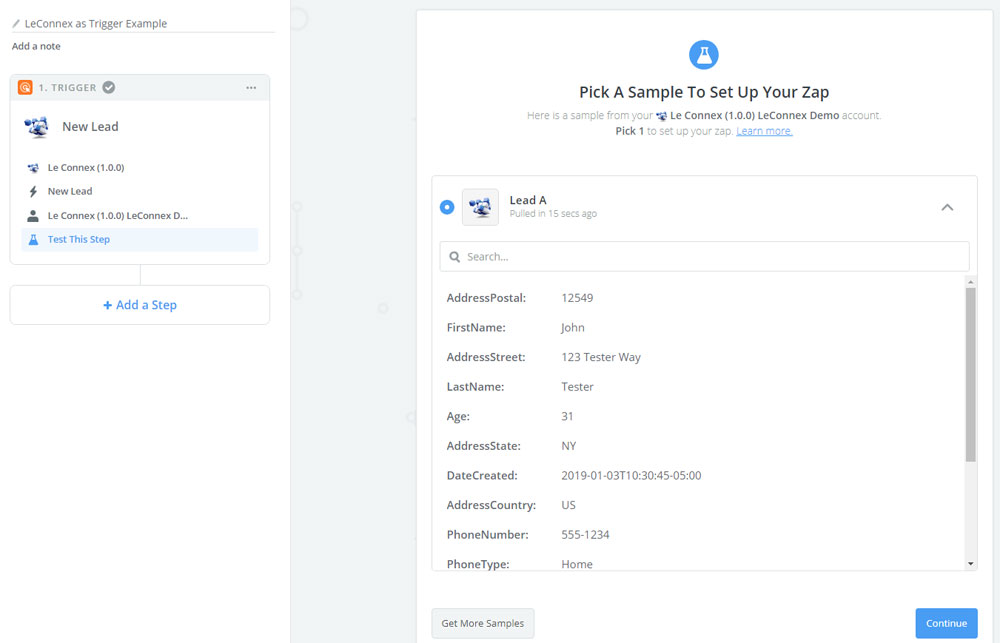
6) Once the new lead is saved in LeConnex, return to the Zapier screen. Within a few seconds, the sample record should appear there. However, if you see an error message that Zapier was unable to obtain a sample, try refreshing the page and then the record should appear. If more than one record appears, you can select any one of them so long as all the data fields you need are filled out. You can click the arrow button to expand the record, which lists each data field name and corresponding value. When done, click "Continue".
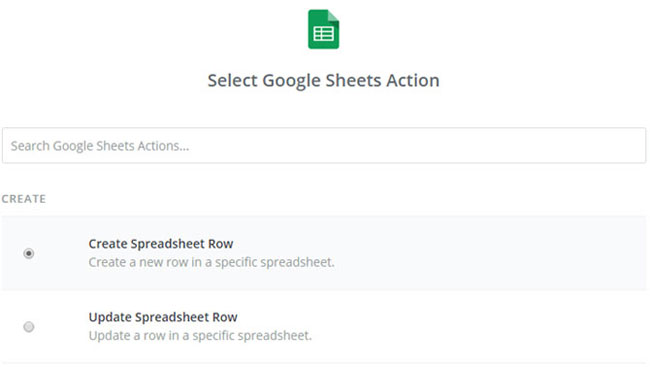
7) At this point, the trigger step of your Zap is complete, and now you will set up your action. Just like when you selected "Le Connex" as the trigger app, you will now select your action app. In our example, we're selecting "Google Sheets".
8) Select the action you want your action app to take. In our example, it is to create a spreadsheet row.
9) Select the applicable connected account from the list, or, if you have not created a connection yet, click "Connect an Account" and follow the instructions.
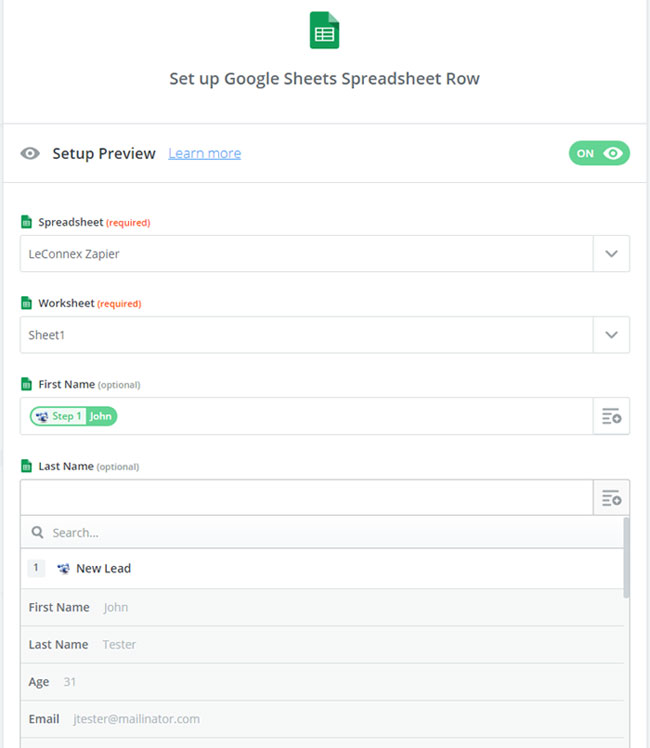
10) Next, you will set up a preview using the sample record retrieved in step 6. This screen may offer different options from what appears in our example, since you may be connecting a different app that requires different settings or parameters. But here, we select the spreadsheet and worksheet where we want to insert the new lead. The important takeaway from this step is that you're mapping the data fields in your action app with those in the LeConnex app, so that they can properly sync with each other.
11) In the next screen, you will review the settings and mappings you created in the previous step, in preparation to fire off your sample record to the action app. Click the "Send Test..." button at the bottom right to proceed.
12) When you see a message that the test was successful, you have now completed the setup. We recommend checking the results in your action app just to make sure everything looks okay, but as long as no errors occurred during this step then all should be running smoothly. Click 'Finish' and then turn on your Zap, and you are all set!
